Integrating Apache Pulsar with BigQuery
One common data engineering task is offloading data into your company’s data lake. You may also want to transform and enrich that data during the ingestion process to prepare it for analysis. This blog post will show you how to integrate Apache Pulsar with Google BigQuery to extract meaningful insights.
Let’s assume that you have files stored in an external file system and you want to ingest the contents into your data lake. You will need to build a data pipeline to ingest, transform, and offload the data like the one in the figure below.
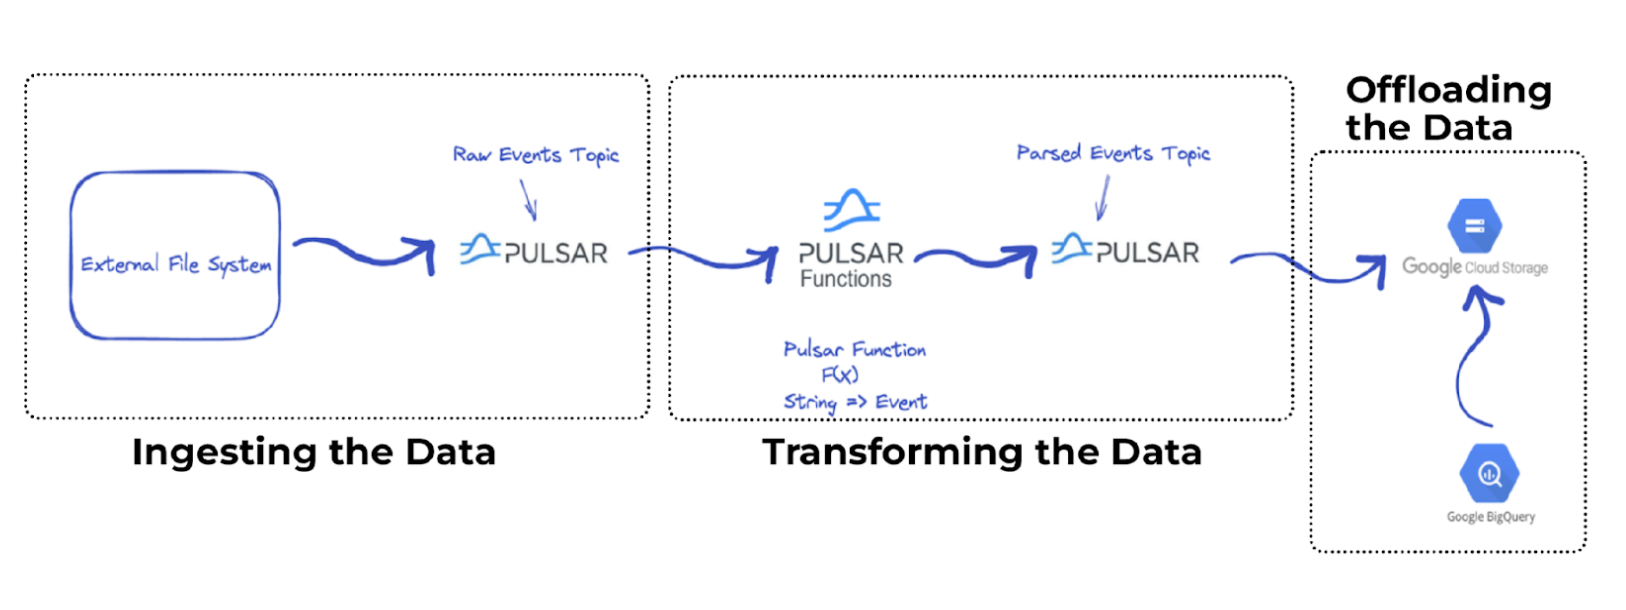
The data pipeline leverages Apache Pulsar as the message bus and performs simple transformations on the data before storing it in a more readable format such as JSON. You can then offload these JSON records to your data lake and transform them into a more queryable format such as parquet using the Apache Pulsar Cloud Storage Sink connector.
Building the Data Pipeline
Now that you have an idea of what you are trying to accomplish, let’s walk through the steps required to implement this pipeline.
Ingesting the Data
First, you need to read the data from the file system and send it to a Pulsar topic. The code snippet below creates a producer that writes <String> messages inside the raw event topic.
The Pulsar topic includes the file contents.
Transforming the Data
Second, you must complete the following steps to transform the data.
- Read the <String> messages from the raw events topic.
- Parse the messages as an Event object.
- Write the messages into a downstream parsed events topic in JSON format.
- Read the messages by using a Pulsar Function with the following signature Function<String, Event>.
- Deploy the functions using the following configuration file.
The important part here is the className, which is the path for the parsing function, the input topic name, and the output topic name.
- Run the mvn clean package command to package the code and generate a jar file.
- Deploy the Pulsar Function on the cluster.
The –function-config-file points to the configuration file and the –jar option specifies the path for the jar file.
You have successfully deployed the Pulsar Function that will transform your messages.
Offload the Data to Google Cloud Storage
The third step is to deploy the Cloud Sink Connector that will listen to the parsed events topic and store the incoming messages into Google Cloud Storage in the Avro format.
- Deploy the connector by providing a configuration file like the one below.
The configs section includes the different configurations you want to tune for setting up the connector. You can find all the available configuration options in the connector repository.
Let’s walk through the example code above.
First, specify the connection credentials as part of the configuration. (You can also pass a file.) Next, specify the formatType (parquet) and the partitionerType (time) to partition based on the date. Typically in a streaming pipeline, you don’t want to produce too many small files because they will slow down your queries if the data gets too large. In this example use case, a new file is created every 10,000 messages.
- Deploy the connector on your cluster by running the following command:
The –sink-config-file provides the path to the configuration file, -name specifies the connector name, and the last line specifies the .nar file location.
With the Pulsar function and connector up and running, you are ready to execute the producer code and generate some messages. The sample data file contains 49,999 lines (50,000 including the header).
- Run the producer and then navigate to the Google Cloud Storage console where you can verify that you ingested new files and all of your records are accounted for.
Querying on Google Cloud
In Google Cloud Storage, you should see a new folder with the tenant name you specified when you created the topic inside Pulsar.
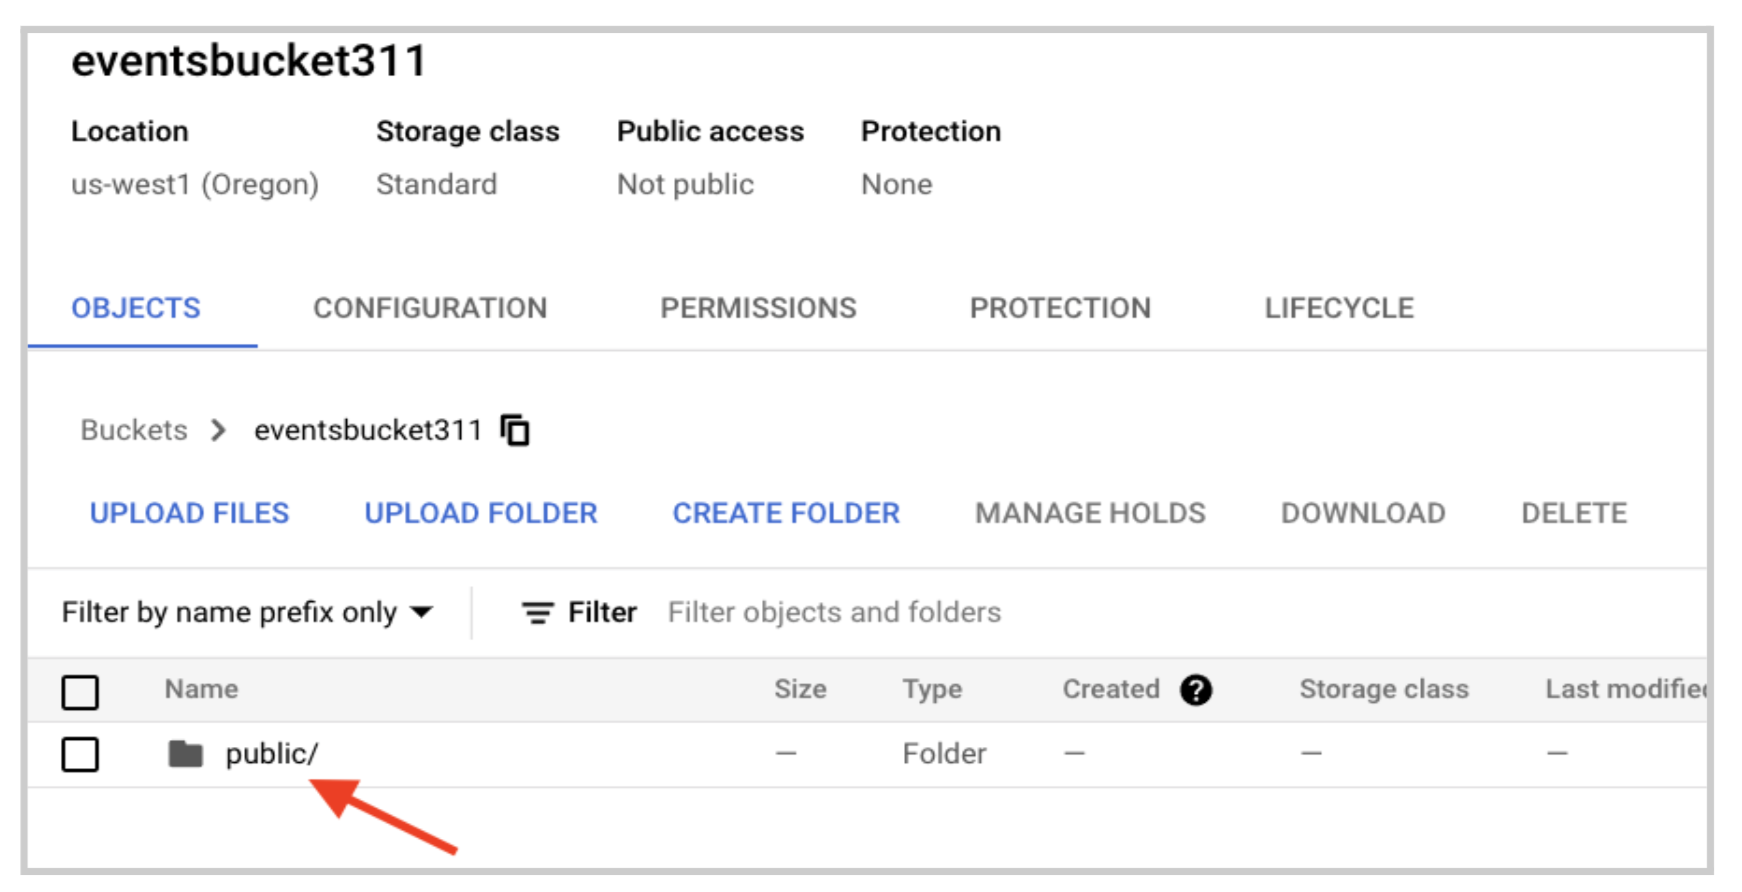
In the previous section, the example code uses the public tenant so your folder structure should be public -> default -> topic name -> date.
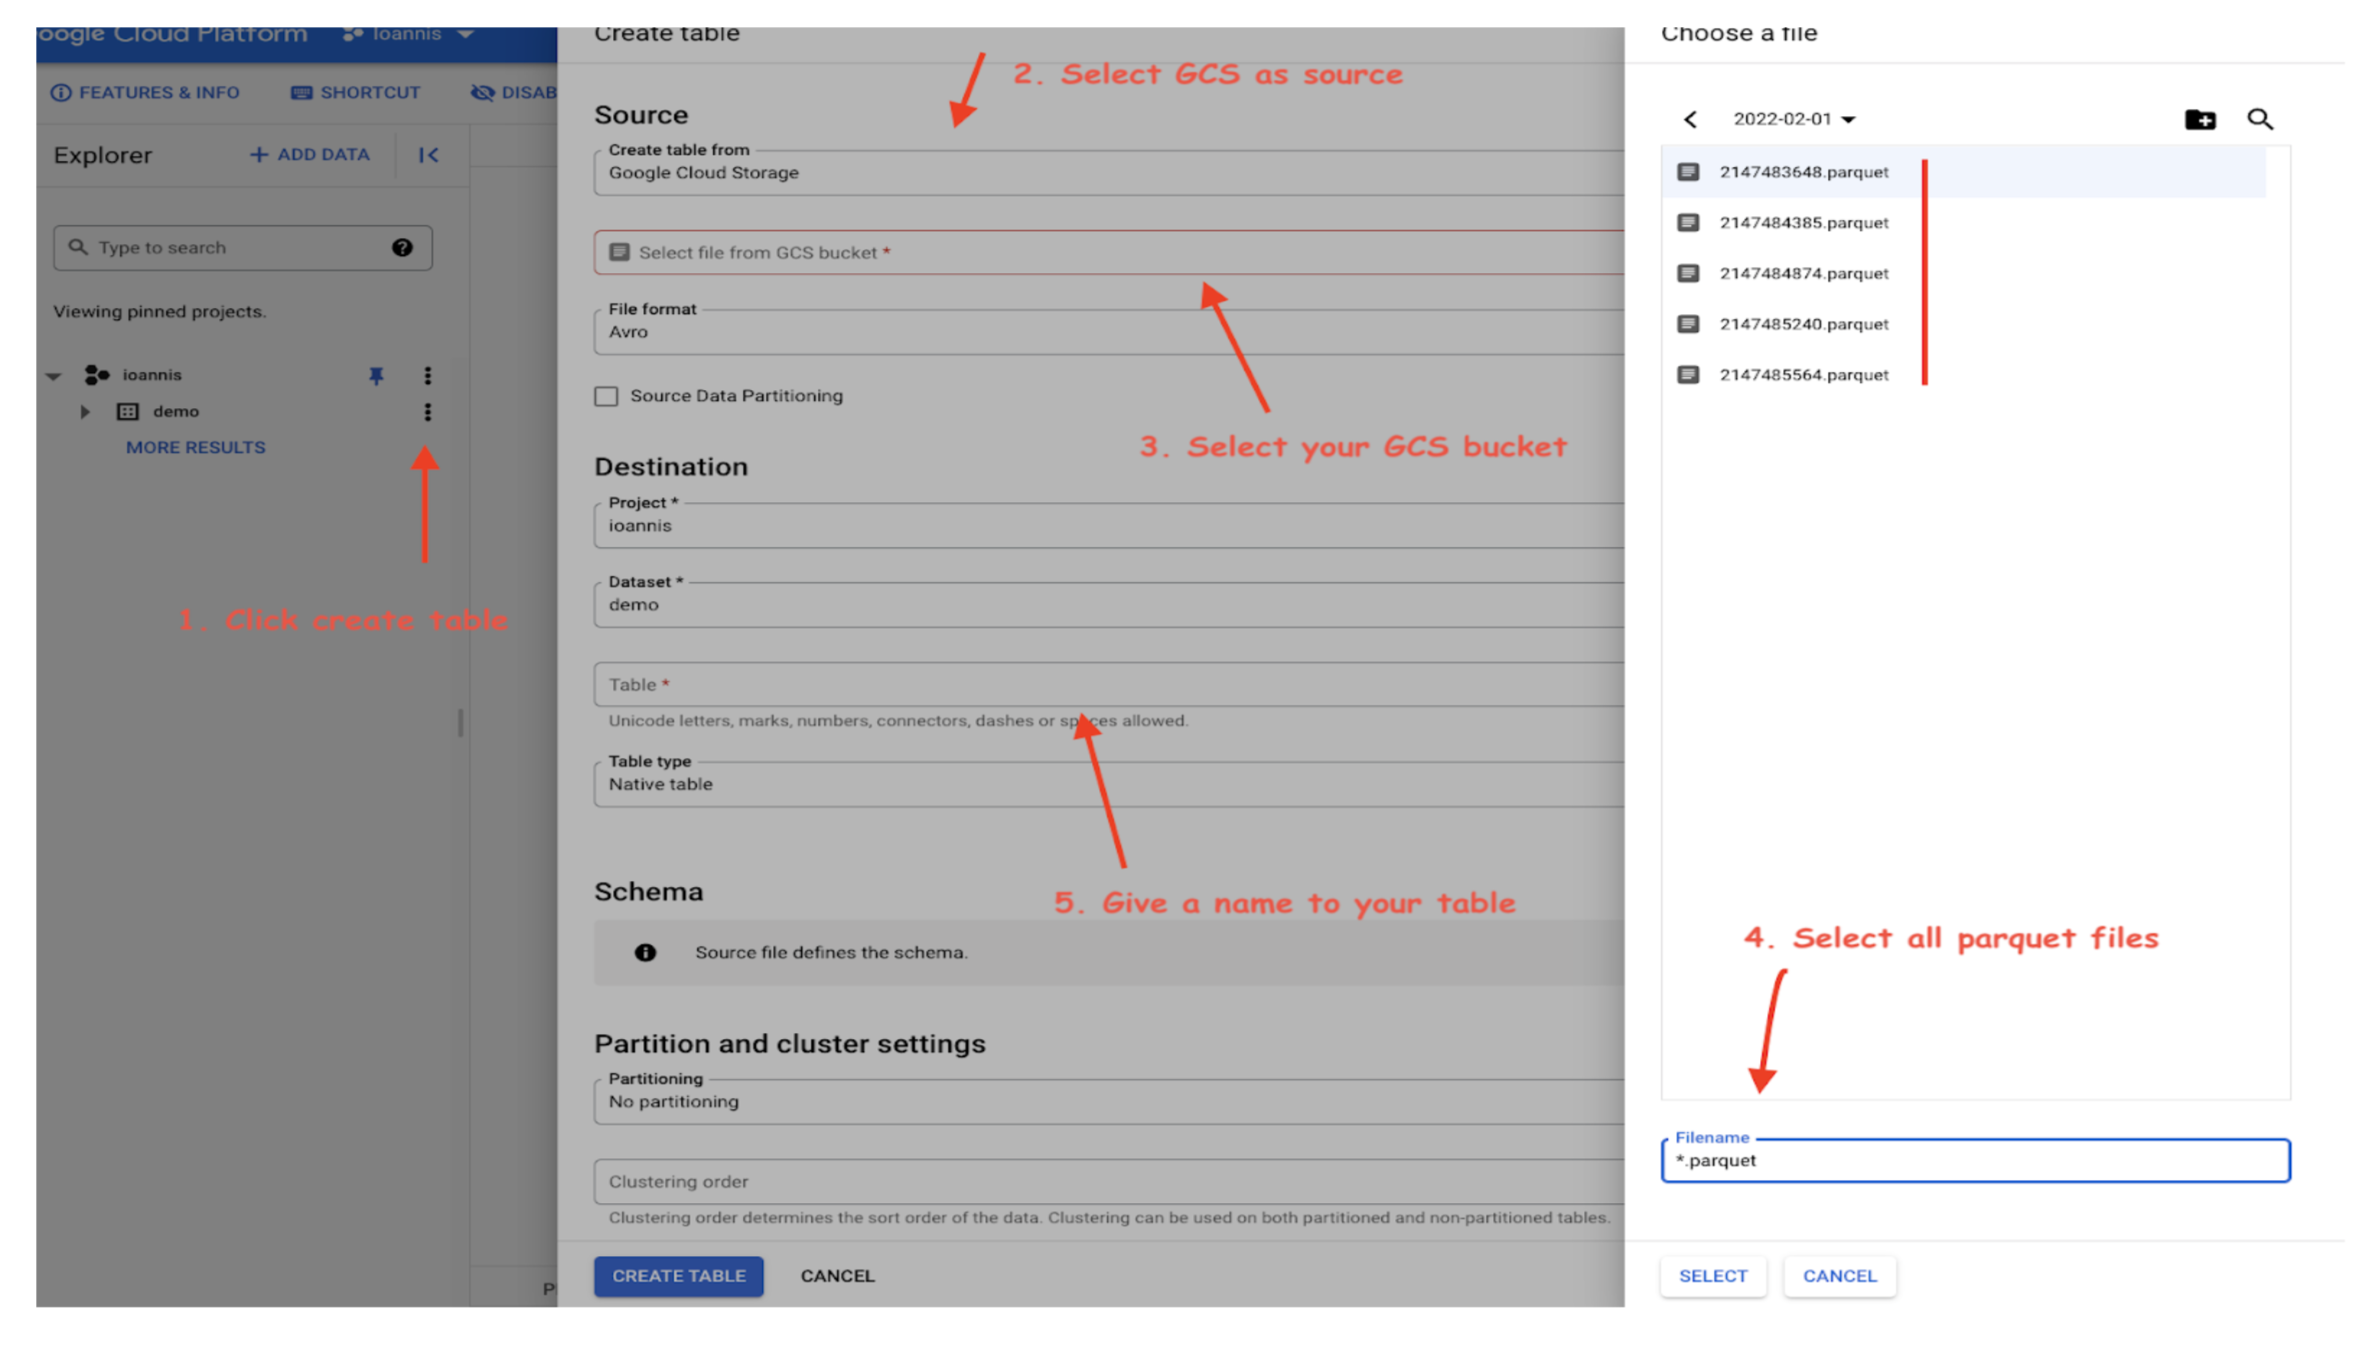
Before you can go into BigQuery and start querying your data, you’ll need to set up a dataset and then create a new table based on the parquet file you have on Google Cloud Storage.
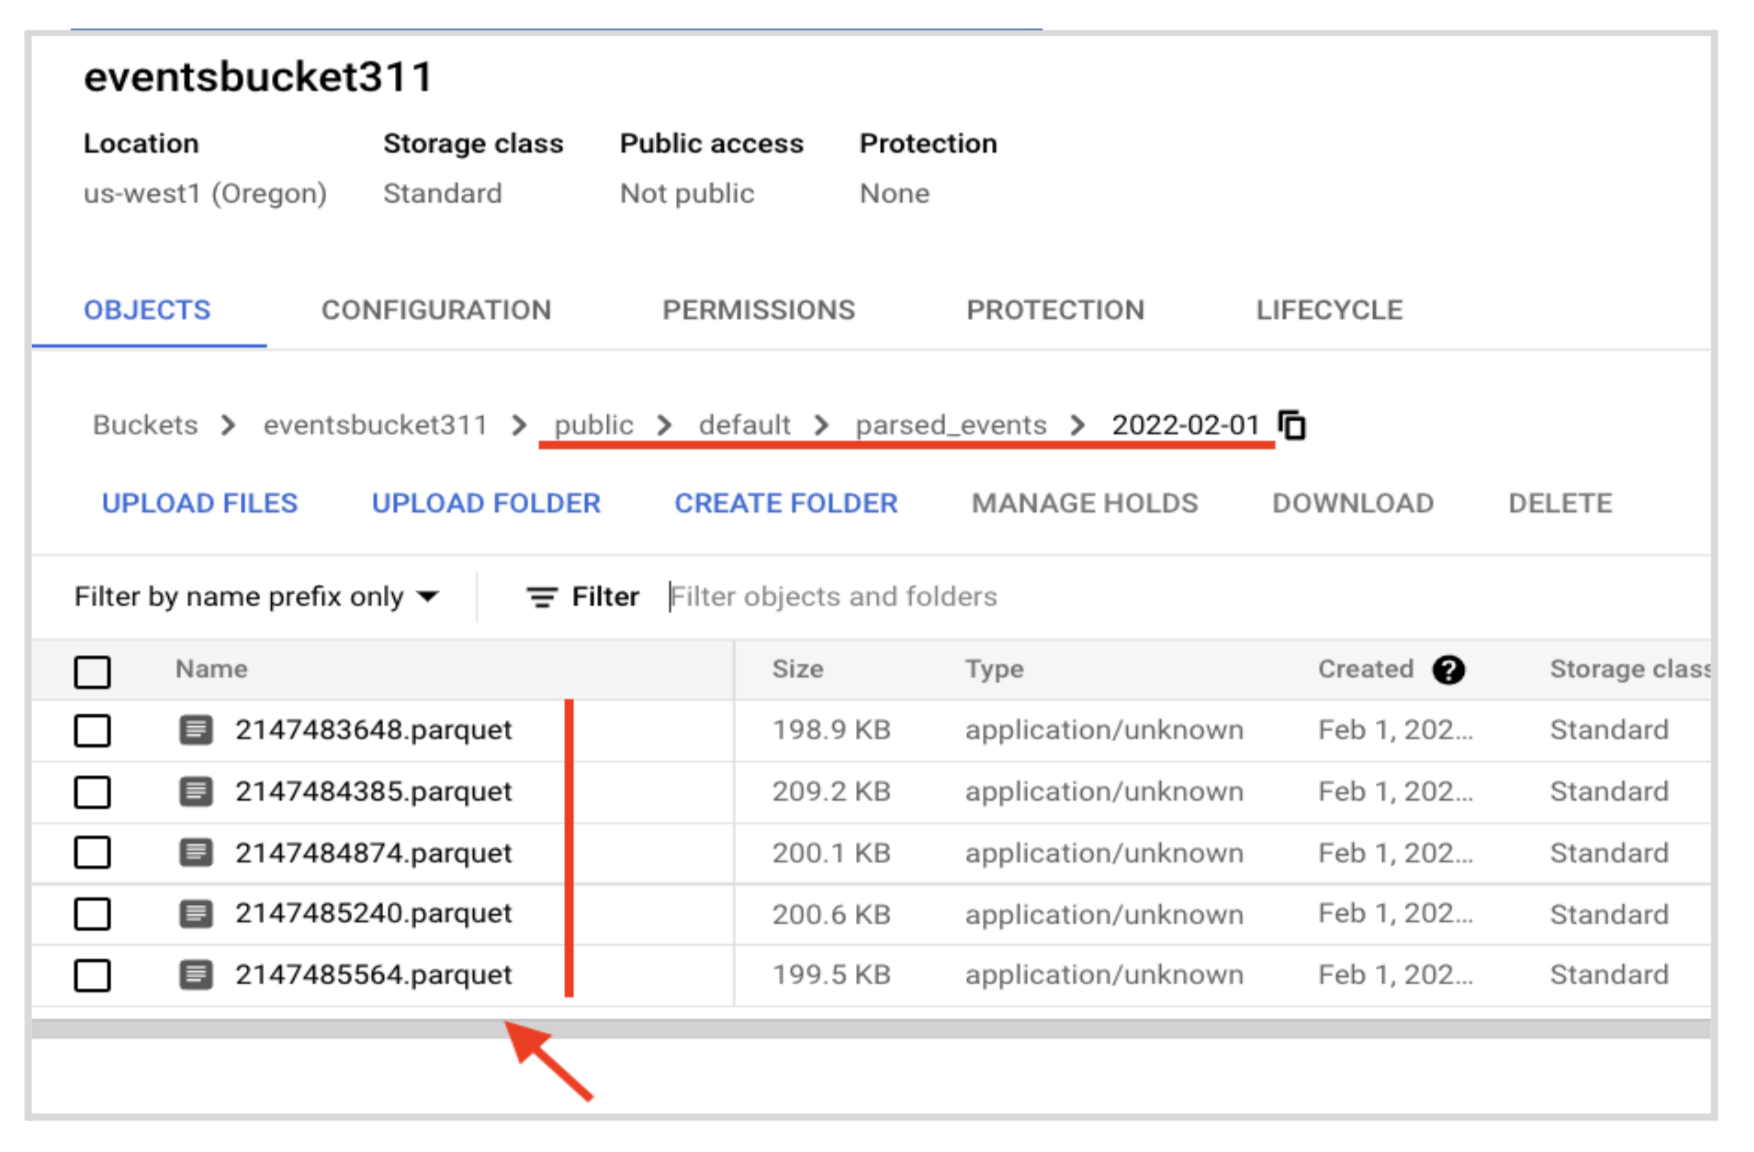
Previously, you specified you wanted a batch size of 10,000 records and you sent 49,999 messages. You should see 5 parquet files.
Now, you can go into BigQuery and create tables based on your data and start executing queries to validate that everything is in place.
- Create a dataset.

- Create a table.
- Verify that all your data is in place and ready for analysis jobs by running Select *.
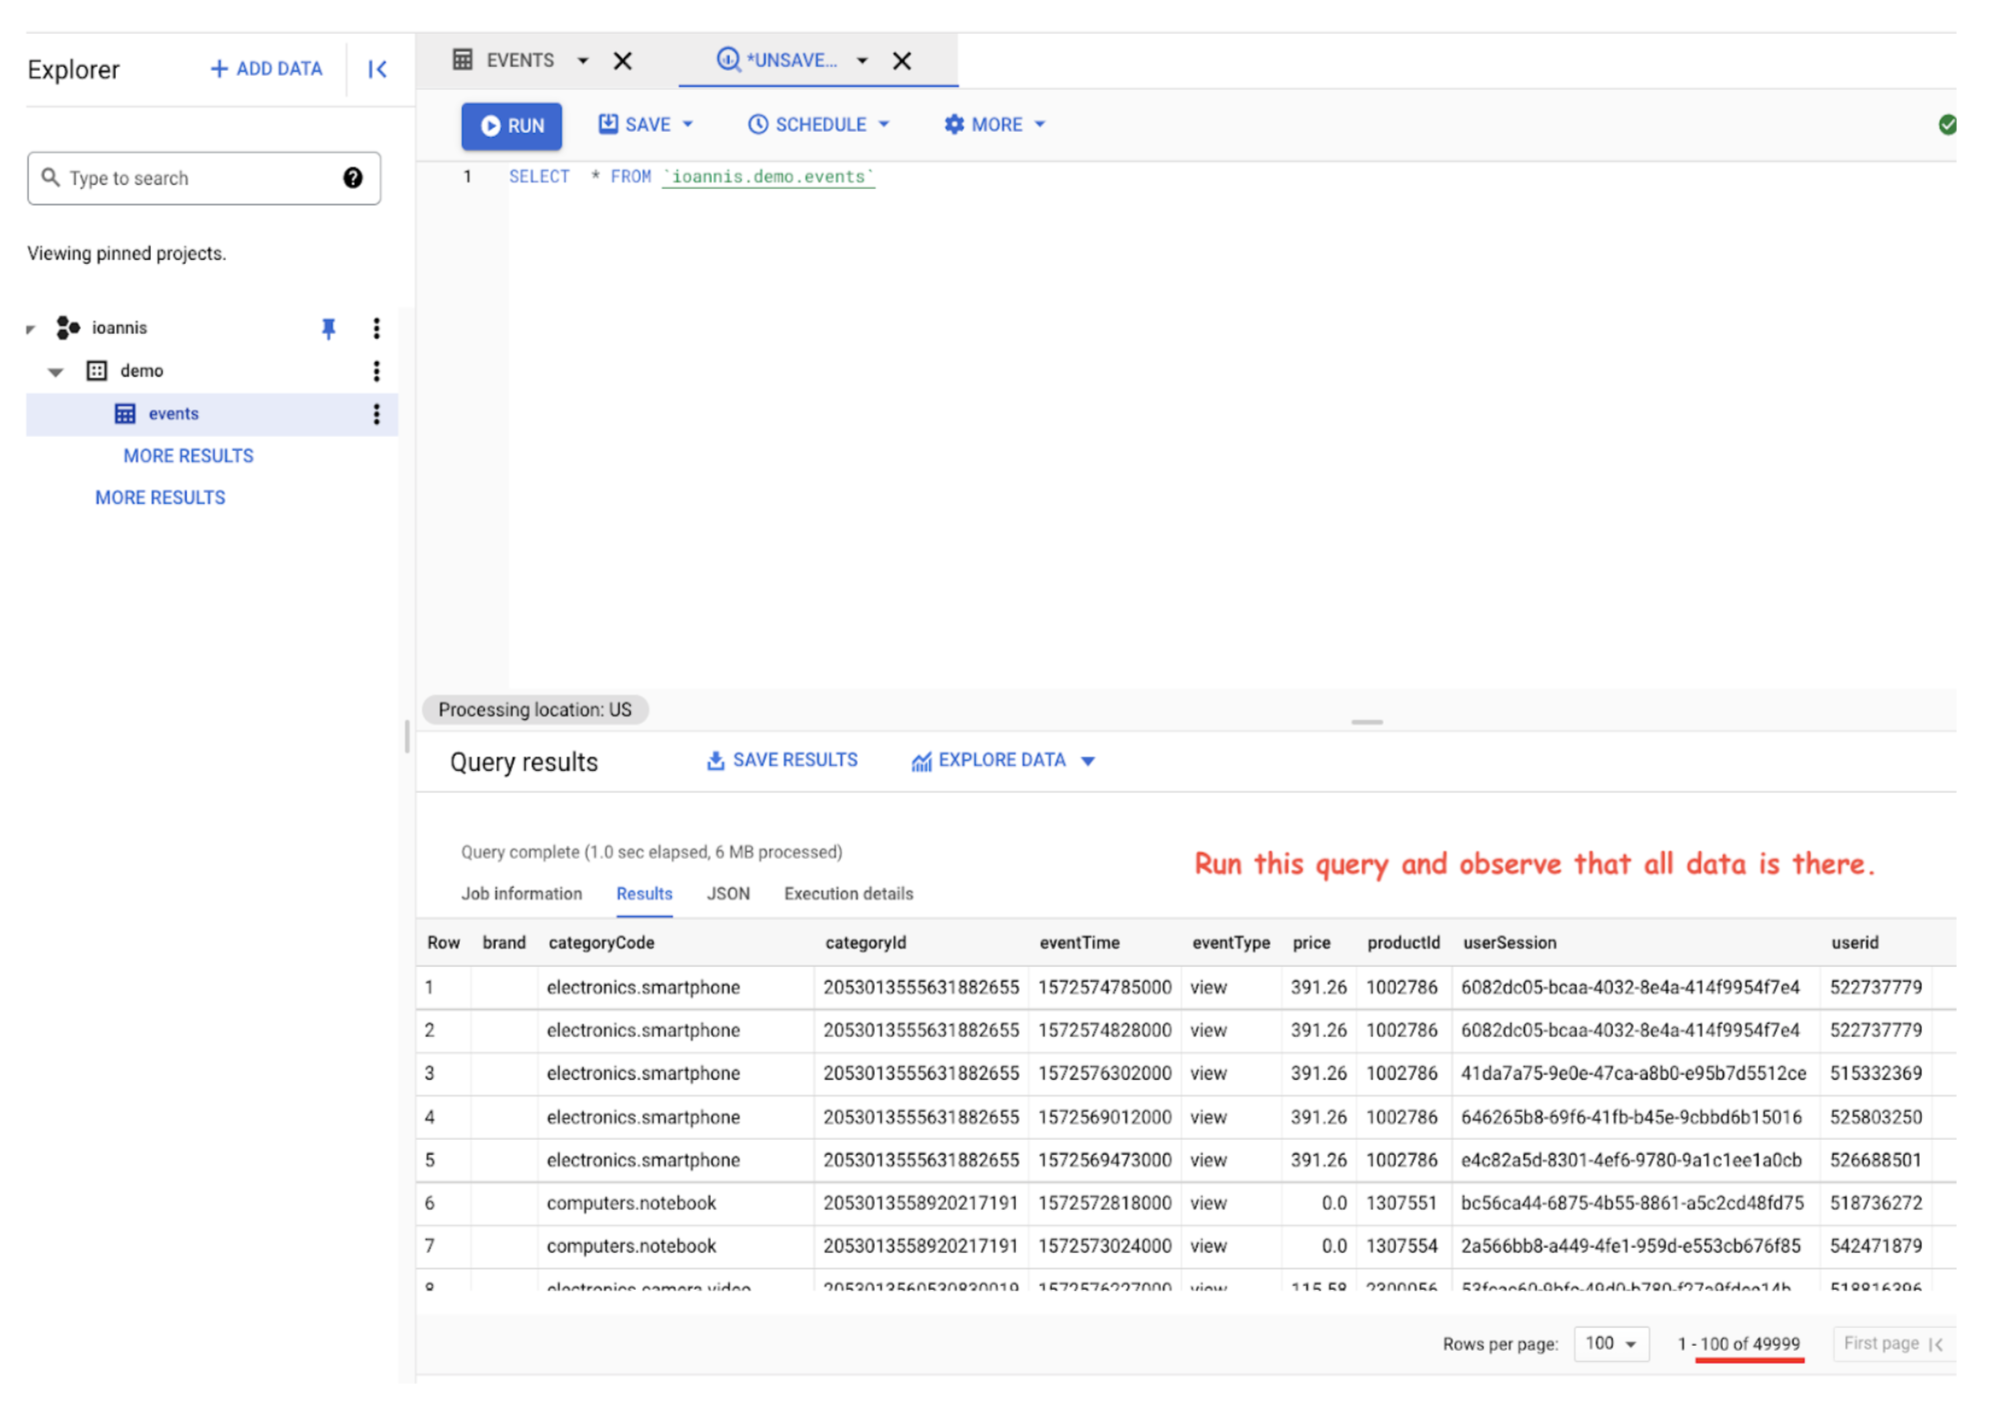
Querying on Google Cloud interface
Congratulations, you have successfully integrated Apache Pulsar with BigQuery!
Resources
Newsletter
Our strategies and tactics delivered right to your inbox


.png)

.png)
