Use Apache SkyWalking to Trace Apache Pulsar Messages
Overview
Apache Pulsar is a distributed messaging platform and a fast-growing alternative to Kafka. Apache SkyWalking is a popular application performance monitoring tool for distributed systems, specially designed for microservices, cloud-native, and container-based (Docker, K8s, and Mesos) architectures.
Message tracing is a very useful feature which helps engineers troubleshoot problems related to message publishing and receiving.
This tutorial shares how to track Pulsar messages by using SkyWalking.
Prerequisite
Before getting started, make sure you have installed Git, JDK 8, Maven 3, and Pulsar (cluster or standalone). If you do not have an available Pulsar, follow the instruction (http://pulsar.apache.org/docs/en/standalone/) to install.
Build Pulsar agent from SkyWalking source
The Apache Pulsar agent will be officially released in the SkyWalking 6.5.0, since it has not been released yet, you need to build a Pulsar agent from the source of SkyWalking.
1. Download the SkyWalking source and build the Pulsar agent plugin.
2. Decompress the file apache-SkyWalking-apm-bin.tar.gz.
After the decompression, all packages are in the directory apm-dist/target.
You can find the Pulsar agent plugin is in the directory agent/plugins.
Congratulations, you have successfully built the Pulsar agent plugin.
Start a SkyWalking backend
If you already have an available SkyWalking backend, you can skip this step. If not, here is a quick start for running a SkyWalking backend locally.
Tip: if you run the SkyWalking backend and Pulsar broker on the same machine, you need to change the web service port of SkyWalking or Pulsar.
For how to change the web service port of SkyWalking UI, see here.
If you want to change the web service port of Pulsar broker, edit the file conf/broker.conf.
Download test project and set up
1. Download the SkyWalking integration test for Apache Pulsar.
2. Import the project pulsar-scenario to your IDE.
Here takes Intelli IDEA as an example.
As shown in the image below, the project pulsar-scenario is a spring boot application and has a CaseController.
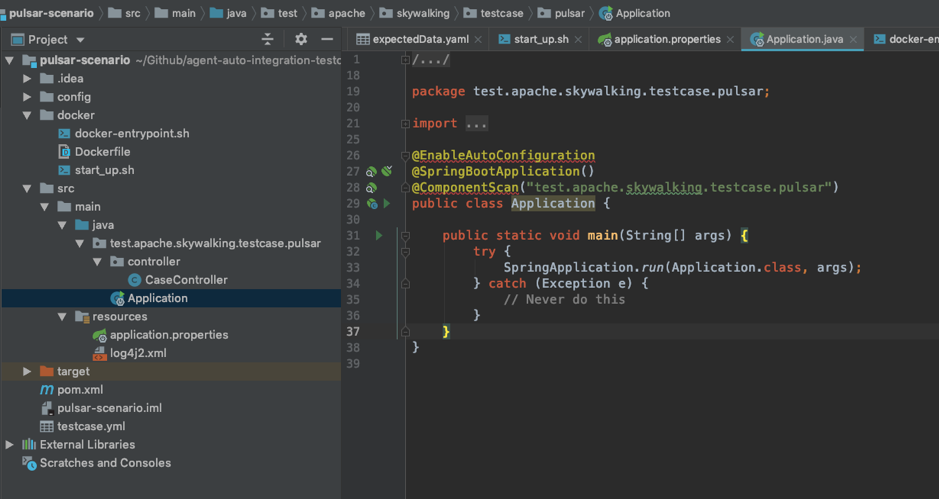
3. Set up the Pulsar agent plugin.
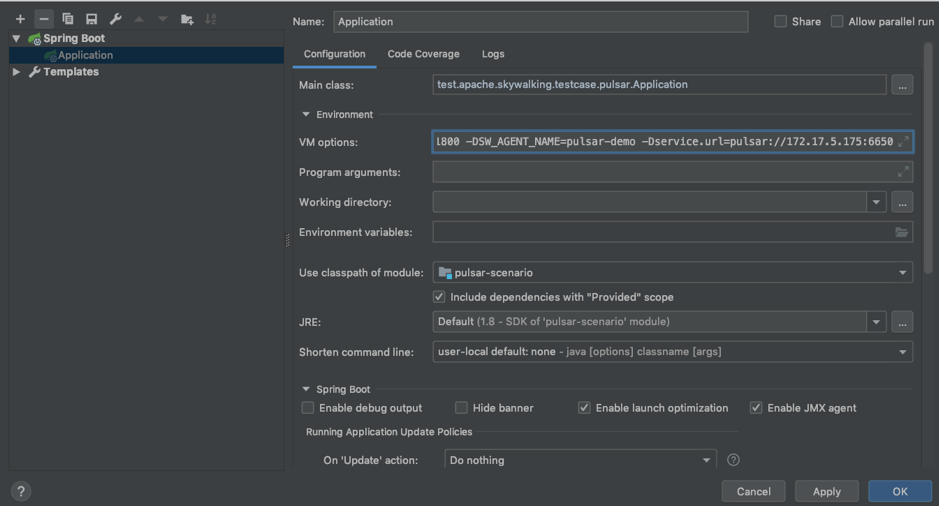
Before starting the spring boot application, you need to set up the Pulsar agent plugin.
Tip:
- For how to set up a Java agent and its properties, see here.
- By default, the project pulsar-scenario uses the 8082 port.
- Detail of VM options as shown in the image below:
Test and view in SkyWalking
After performing the steps stated previously, you have prepared all the environments. Next, you can simulate some requests and view them in SkyWalking UI. Download the pulsar-case.
By executing the HTTP request above, some traces are created in SkyWalking. Let’s go to the SkyWalking UI to check them.
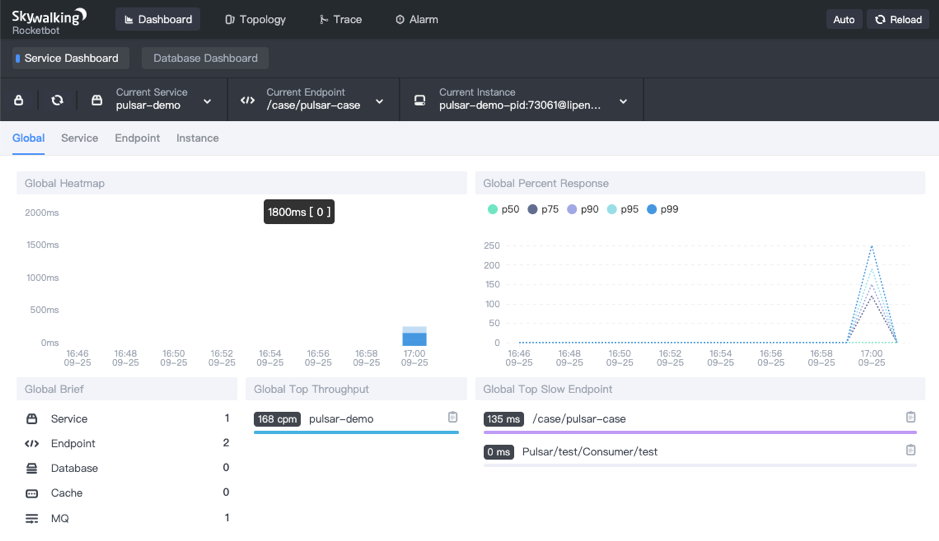
Dashboard view
It shows there are 2 endpoints, 1 service, and 1 MQ.
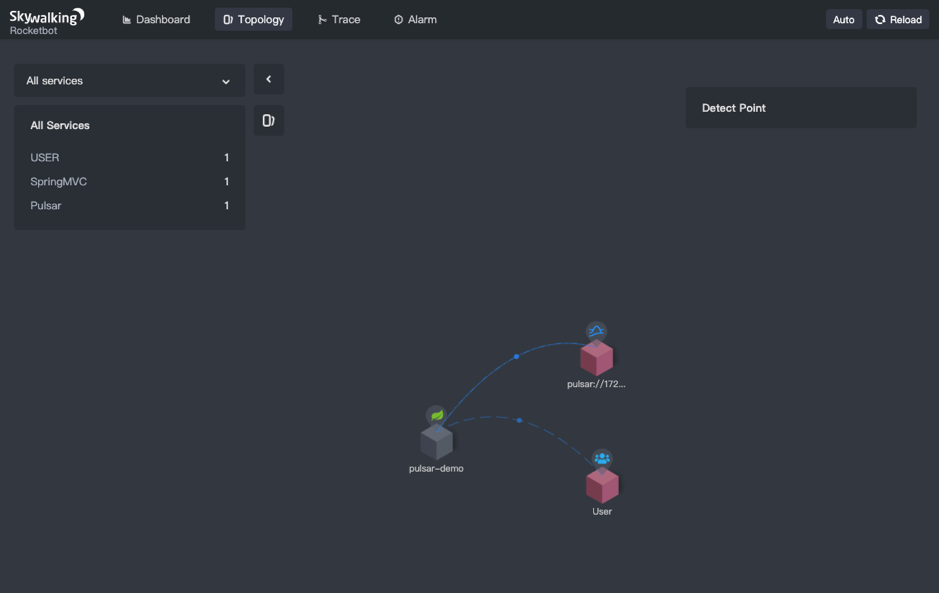
Topology view
It shows that a user sends a request to the web service (that is, your test web application) and the web service sends to and receives messages from a Pulsar broker.
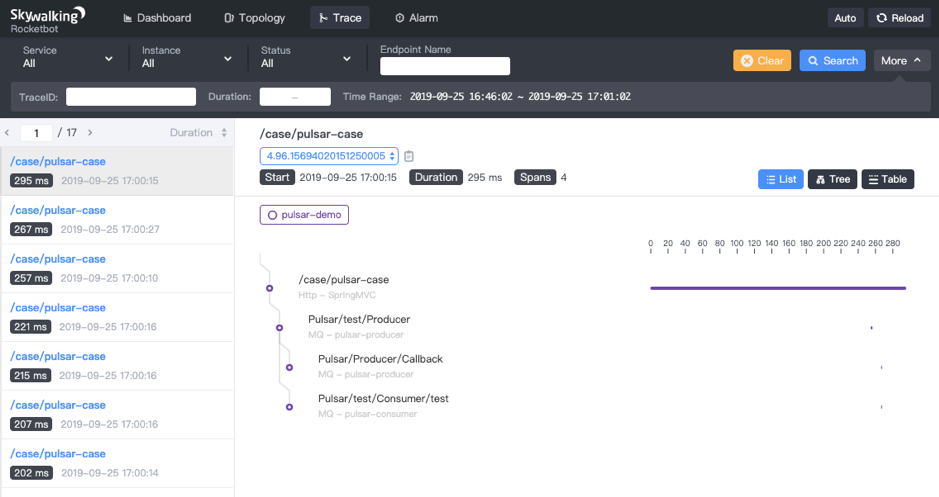
Trace view
It shows the trace details of each request.
Currently, the Pulsar agent plugin has 3 types of spans as below:
- Producer span, which records messages sent by producers.
- Producer callback span, which records messages are already sent.
- Consumer span, which records messages are received by consumers.
Summary
As you can see, SkyWalking UI is pretty cool! If you are still worried about how to track Pulsar messages, try this integration of Pulsar and SkyWalking.
Thanks for the SkyWalking community who gives me a lot of help for the integration of Pulsar and SkyWalking.
Newsletter
Our strategies and tactics delivered right to your inbox


.png)

.png)
