Note: StreamNative now offers a unified approach to managing Pulsar clusters on Kubernetes systems, transitioning from two distinct versions of operators—Pulsar Operators (Basic Version) and StreamNative Operator (Advanced Version)—to a single, consolidated operator, StreamNative Operator, effective from the start of 2024. As part of this change, we will cease the release of new versions of Pulsar Operators, with future updates and enhancements being exclusively available through the StreamNative Operator, accessible only via StreamNative's paid services.
In this Part 3 blog, I will demonstrate how to containerize Pulsar client applications (producer and consumer) using Dockerfiles in VS Code. With Dockerfiles, we can build the container image in the local Docker daemon, test the image using docker run, tag the image and push it to the Docker registry. This is probably the most common approach for the cloud-native build process.
Preparation
In this demo, I used python venv to control the Python version. The following code snippet shows how I created the Python environment and Python library before opening the folder using code .
mkdir cloudnative-pulsar
cd cloudnative-pulsar
python3 -m venv .py39
source .py39/bin/activate
python -m pip install --upgrade pip
pip install pulsar-client==2.9.2
git init
code .
My initial VS Code interface looks like this. I also opened a terminal window to run kubectl or docker build in the same interface.
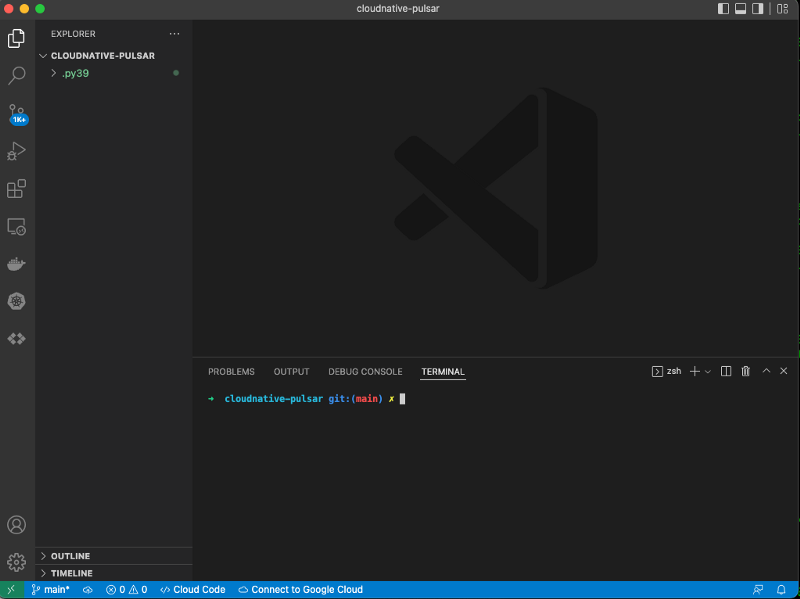
In Part 1, I exposed the proxy Service as a load balancer (external IP). This way, I can connect to the broker on Kubernetes directly from my home network. I will use that same Pulsar cluster on Kubernetes for this demo.
Let’s get started with the Python producer and consumer.
Create a Python client
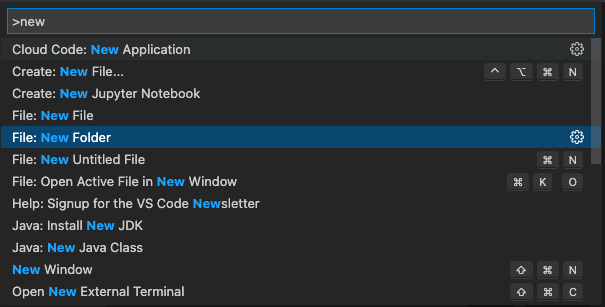
- Use ⇧⌘P to bring up the VS Code Command Palette, type “new,” and select “File: New Folder.” Add a folder called “producer.”
- You can use the icon in the project explorer to create a new Python file, like test_producer.py.

- Before you create a client (either producer or consumer), you need to create a topic first. You can use either pulsar-admin or admin restful API to create topics. I used kubectl exec to run the pulsar-admin command in the broker container and created a topic using the VS Code terminal window.
kubectl exec -n sn-platform my-broker-0 -- bin/pulsar-admin topics create persistent://public/default/my-topic1
- You should be able to see the topic created using the following command.
kubectl exec -n sn-platform my-broker-0 -- bin/pulsar-admin topics list public/default
"persistent://public/default/my-topic1"
- Now we are ready to type some Python codes. Copy the following snippet to test_producer.py and save the file.
import pulsar
client = pulsar.Client('pulsar://10.0.0.36:6650')
producer = client.create_producer(
   'persistent://public/default/my-topic1',
   block_if_queue_full=True,
   batching_enabled=True,
   batching_max_publish_delay_ms=10)
def producer_callback(res, msg_id):
   print(f"message published {msg_id}")
i = 0
while i
- In the terminal, you can run the producer code like this. Note that my laptop can access the Pulsar proxy IP directly.
source .py39/bin/activate
python producer/test_producer.py
2022-05-15 21:49:46.917 INFO  [0x104948580] ClientConnection:182 | [ -> pulsar://10.0.0.36:6650] Create ClientConnection, timeout=10000
2022-05-15 21:49:46.918 INFO  [0x104948580] ConnectionPool:96 | Created connection for pulsar://10.0.0.36:6650
2022-05-15 21:49:46.942 INFO  [0x16b81b000] ClientConnection:368 | [10.0.0.7:59912 -> 10.0.0.36:6650] Connected to broker
2022-05-15 21:49:46.979 INFO  [0x16b81b000] HandlerBase:64 | [persistent://public/default/my-topic1, ] Getting connection from pool
2022-05-15 21:49:46.986 INFO  [0x16b81b000] ClientConnection:182 | [ -> pulsar://10.0.0.36:6650] Create ClientConnection, timeout=10000
2022-05-15 21:49:46.986 INFO  [0x16b81b000] ConnectionPool:96 | Created connection for pulsar://my-broker-0.my-broker-headless.sn-platform.svc.cluster.local:6650
2022-05-15 21:49:46.993 INFO  [0x16b81b000] ClientConnection:370 | [10.0.0.7:59913 -> 10.0.0.36:6650] Connected to broker through proxy. Logical broker: pulsar://my-broker-0.my-broker-headless.sn-platform.svc.cluster.local:6650
2022-05-15 21:49:47.040 INFO  [0x16b81b000] ProducerImpl:188 | [persistent://public/default/my-topic1, ] Created producer on broker [10.0.0.7:59913 -> 10.0.0.36:6650]
- The code returned without an error, but how do we know it published 1000 messages on the topic? Let’s use pulsar-admin to check the topic stats. Alternatively, you can use the restful endpoint to access the admin port 8080.
kubectl exec -n sn-platform my-broker-0 -- bin/pulsar-admin topics stats public/default/my-topic1
Defaulted container "pulsar-broker" out of: pulsar-broker, init-sysctl (init)
{
 "msgRateIn" : 0.0,
 "msgThroughputIn" : 0.0,
 "msgRateOut" : 0.0,
 "msgThroughputOut" : 0.0,
 "bytesInCounter" : 14921,
 "msgInCounter" : 1000,
 "bytesOutCounter" : 0,
 "msgOutCounter" : 0,
 "averageMsgSize" : 0.0,
 "msgChunkPublished" : false,
 "storageSize" : 14921,
 "backlogSize" : 0,
 "offloadedStorageSize" : 0,
 "lastOffloadLedgerId" : 0,
 "lastOffloadSuccessTimeStamp" : 0,
 "lastOffloadFailureTimeStamp" : 0,
 "publishers" : [ ],
 "waitingPublishers" : 0,
 "subscriptions" : { },
 "replication" : { },
 "deduplicationStatus" : "Disabled",
 "nonContiguousDeletedMessagesRanges" : 0,
 "nonContiguousDeletedMessagesRangesSerializedSize" : 0,
 "compaction" : {
   "lastCompactionRemovedEventCount" : 0,
   "lastCompactionSucceedTimestamp" : 0,
   "lastCompactionFailedTimestamp" : 0,
   "lastCompactionDurationTimeInMills" : 0
 }
}
- From the output, you can see that there are 1000 msgIn. With the client code ready, we can build the image and make this producer a Kubernetes Deployment in the next steps.
Containerize and deploy the producer application
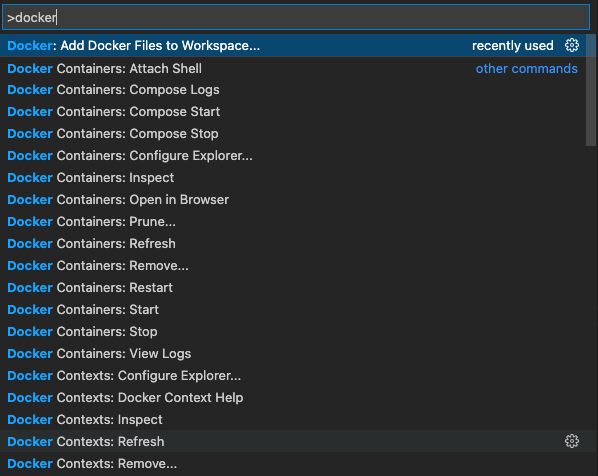
- Use the command palette to create a Dockerfile.
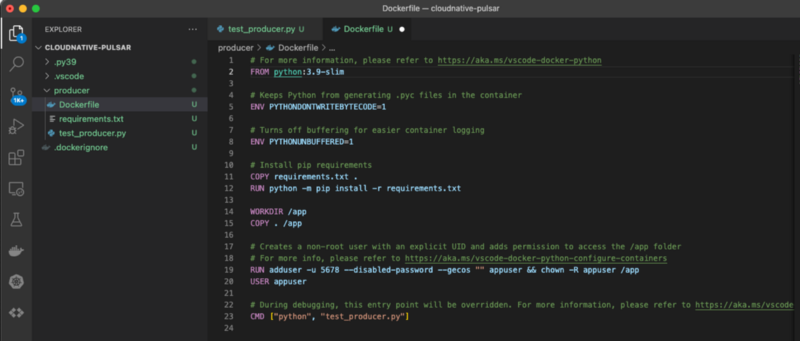
- You can find the Dockerfile and requirements.txt created in your project folder. I moved the files to the producer folder and modified the content to fit the folder because I wanted to create two images for the producer and the consumer, respectively. Don’t forget to put the Python dependency (pulsar-client==2.9.2) in the requirements.txt file.
- Now, we are ready to build the Docker image. Run the following command to build the image. Note that if you are using Mac M1, you need to specify the image platform to fit your Kubernetes worker OS (mine is Ubuntu). Also, remember to log in to your Docker Hub account. In my case, it is yuwsung1.
docker buildx build --platform linux/amd64 . -t yuwsung1/pulsar-python-producer:v0.1
docker push yuwsung1/pulsar-python-producer:v0.1
- Once the image is pushed to Docker Hub, you can use kubectl to run the image as a container and check the topic stats for new messages.
kubectl run prod-test --image=yuwsung1/pulsar-python-producer:v0.1
kubectl exec -n sn-platform my-broker-0 -- bin/pulsar-admin topics stats public/default/my-topic1
Defaulted container "pulsar-broker" out of: pulsar-broker, init-sysctl (init)
{
 "msgRateIn" : 0.0,
 "msgThroughputIn" : 0.0,
 "msgRateOut" : 0.0,
 "msgThroughputOut" : 0.0,
 "bytesInCounter" : 29482,
 "msgInCounter" : 2000,
 "bytesOutCounter" : 0,
 "msgOutCounter" : 0,
 "averageMsgSize" : 0.0,
 "msgChunkPublished" : false,
 "storageSize" : 14921,
 "backlogSize" : 0,
 "offloadedStorageSize" : 0,
 "lastOffloadLedgerId" : 0,
 "lastOffloadSuccessTimeStamp" : 0,
 "lastOffloadFailureTimeStamp" : 0,
 "publishers" : [ ],
 "waitingPublishers" : 0,
 "subscriptions" : { },
 "replication" : { },
 "deduplicationStatus" : "Disabled",
 "nonContiguousDeletedMessagesRanges" : 0,
 "nonContiguousDeletedMessagesRangesSerializedSize" : 0,
 "compaction" : {
   "lastCompactionRemovedEventCount" : 0,
   "lastCompactionSucceedTimestamp" : 0,
   "lastCompactionFailedTimestamp" : 0,
   "lastCompactionDurationTimeInMills" : 0
 }
}
- From the output above, you can see that the containerized producer published another 1000 messages on the topic.
However, this image is useless. The URL, topic name, and other producer properties are hard-coded in the Python code. Therefore, we need to set those properties to a Kubernetes ConfigMap and use a Deployment to mount the ConfigMap as container environment variables. Then in the Python code, we can import the OS module and read the environment variables to replace those properties.
Use a ConfigMap to manage producer properties
- We can change the producer code by using environment variables:
import pulsar
import os
pulsar_url = os.environ.get('PULSAR_URL')
topic = os.environ.get('PULSAR_TOPIC')
client = pulsar.Client(pulsar_url)
producer = client.create_producer(
   topic,
   block_if_queue_full=True,
   batching_enabled=True,
   batching_max_publish_delay_ms=10)
def producer_callback(res, msg_id):
   print(f"message published {msg_id}")
i = 0
while i
- To test the code locally, I exported PULSAR_URL and TOPIC in my current local environment.
export PULSAR_URL='pulsar://10.0.0.36:6650'
export PULSAR_TOPIC='persistent://public/default/my-topic1'
python test_producer.py
kubectl exec -n sn-platform my-broker-0 -- bin/pulsar-admin topics stats public/default/my-topic1
Defaulted container "pulsar-broker" out of: pulsar-broker, init-sysctl (init)
{
 "msgRateIn" : 0.0,
 "msgThroughputIn" : 0.0,
 "msgRateOut" : 0.0,
 "msgThroughputOut" : 0.0,
 "bytesInCounter" : 44763,
 "msgInCounter" : 3000,
 "bytesOutCounter" : 0,
 "msgOutCounter" : 0,
 "averageMsgSize" : 0.0,
 "msgChunkPublished" : false,
 "storageSize" : 14921,
 "backlogSize" : 0,
 "offloadedStorageSize" : 0,
 "lastOffloadLedgerId" : 0,
 "lastOffloadSuccessTimeStamp" : 0,
 "lastOffloadFailureTimeStamp" : 0,
 "publishers" : [ ],
 "waitingPublishers" : 0,
 "subscriptions" : { },
 "replication" : { },
 "deduplicationStatus" : "Disabled",
 "nonContiguousDeletedMessagesRanges" : 0,
 "nonContiguousDeletedMessagesRangesSerializedSize" : 0,
 "compaction" : {
   "lastCompactionRemovedEventCount" : 0,
   "lastCompactionSucceedTimestamp" : 0,
   "lastCompactionFailedTimestamp" : 0,
   "lastCompactionDurationTimeInMills" : 0
 }
}
- Let’s rebuild the image with a new tag.
docker buildx build --platform linux/amd64 . -t yuwsung1/pulsar-python-producer:v0.2
docker push yuwsung1/pulsar-python-producer:v0.2
- Note that the v2 needs PULSAR_URL and PULSAR_TOPIC ingested into the producer Pod. The followings are my ConfigMap and Deployment manifests for your reference.
apiVersion: v1
kind: ConfigMap
metadata:
 name: pulsar-producer-config
data:
 pulsar_url: "pulsar://10.0.0.36:6650"
 topic: "my-topic1"
---
apiVersion: apps/v1
kind: Deployment
metadata:
 name: my-producer
spec:
 selector:
   matchLabels:
     app: my-producer
 replicas: 1
 template:
   metadata:
     labels:
       app: my-producer
   spec:
     containers:
     - name: pulsar-producer
       image: yuwsung1/pulsar-python-producer:v0.2
       resources:
         limits:
           cpu: "500m"
           memory: "128Mi"
       env:
         - name: PULSAR_URL
           valueFrom:
             configMapKeyRef:
               name: pulsar-producer-config
               key: pulsar_url
         - name: PULSAR_TOPIC
           valueFrom:
             configMapKeyRef:
               name: pulsar-producer-config
               key: topic
- Use kubectl to deploy the ConfigMap and the Deployment, then check the topic stats.
kubectl apply -f pulsar-producer.yaml
kubectl exec -n sn-platform my-broker-0 -- bin/pulsar-admin topics stats public/default/my-topic1
Defaulted container "pulsar-broker" out of: pulsar-broker, init-sysctl (init)
{
 "msgRateIn" : 0.0,
 "msgThroughputIn" : 0.0,
 "msgRateOut" : 0.0,
 "msgThroughputOut" : 0.0,
 "bytesInCounter" : 59684,
 "msgInCounter" : 4000,
 "bytesOutCounter" : 0,
 "msgOutCounter" : 0,
 "averageMsgSize" : 0.0,
 "msgChunkPublished" : false,
 "storageSize" : 14921,
 "backlogSize" : 0,
 "offloadedStorageSize" : 0,
 "lastOffloadLedgerId" : 0,
 "lastOffloadSuccessTimeStamp" : 0,
 "lastOffloadFailureTimeStamp" : 0,
 "publishers" : [ ],
 "waitingPublishers" : 0,
 "subscriptions" : { },
 "replication" : { },
 "deduplicationStatus" : "Disabled",
 "nonContiguousDeletedMessagesRanges" : 0,
 "nonContiguousDeletedMessagesRangesSerializedSize" : 0,
 "compaction" : {
   "lastCompactionRemovedEventCount" : 0,
   "lastCompactionSucceedTimestamp" : 0,
   "lastCompactionFailedTimestamp" : 0,
   "lastCompactionDurationTimeInMills" : 0
 }
}
- From the above output, you can see that the new containerized producer mounted the Pulsar URL and topic name from the ConfigMap and produced another 1000 messages (4000 in total) to the topic.
Now we can follow the same steps to create a consumer container image and the corresponding Deployment. I will skip the steps in this tutorial, but you can find the consumer code in my GitHub repo.
In the next blog, we will discuss using a Cloud Native Builder, kpack, and ArgoCD to auto-build the container images.
More on Apache Pulsar
Pulsar has become one of the most active Apache projects over the past few years, with a vibrant community driving innovation and improvements to the project. Check out the following resources to learn more about Pulsar.
- Pulsar Virtual Summit Europe 2023 will take place on Tuesday, May 23rd, 2023! See this blog to learn more and submit your session!
- Start your on-demand Pulsar training today with StreamNative Academy.
- Spin up a Pulsar cluster in minutes with StreamNative Cloud. StreamNative Cloud provides a simple, fast, and cost-effective way to run Pulsar in the public cloud.
- Blog Pulsar Operators Tutorial Part 1: Create an Apache Pulsar Cluster on Kubernetes
- Blog Pulsar Operators Tutorial Part 2: Manage Pulsar Custom Resources with ArgoCD
- Blog StreamNative’s Pulsar Operators Certified as Red Hat OpenShift Operators
- Blog Introducing Pulsar Resources Operator for Kubernetes