Pulsar Operators Tutorial Part 2: Manage Pulsar Custom Resources with ArgoCD

Note: StreamNative now offers a unified approach to managing Pulsar clusters on Kubernetes systems, transitioning from two distinct versions of operators—Pulsar Operators (Basic Version) and StreamNative Operator (Advanced Version)—to a single, consolidated operator, StreamNative Operator, effective from the start of 2024. As part of this change, we will cease the release of new versions of Pulsar Operators, with future updates and enhancements being exclusively available through the StreamNative Operator, accessible only via StreamNative's paid services.
In the previous blog, I demonstrated how to deploy a Pulsar cluster using operators. The operators make Pulsar deployment much easier than the installation using Terraform or Ansible.
In this blog, I will demonstrate how to use ArgoCD to control Pulsar Custom Resources (CRs) by monitoring the GitHub branch/tag. In Part 1, you can see that the CRs stored in your local environment work properly in a demo/poc environment. When dealing with a production system, you will face configuration or infrastructure drift (too many chefs in the kitchen situation). GitOps uses git mechanisms to control CR versions in GitHub repositories with branches or tags. This allows you to easily control, roll back, and upgrade the configurations of your deployment, or find related historical changes.
Let’s begin!
1. Create a GitHub repository (pulsar-ops in this example) to keep track of the CRs. ArgoCD will track the changes in a folder of a branch, so I put all the CRs under the default folder.
2. Once all the changes are committed, add the remote to the GitHub target repository, tag the Pulsar version, then push the CRs upstream.
3. Now I can go to the ArgoCD Web UI to create a Pulsar cluster app. Log in to ArgoCD, create a new app with the following information, then click CREATE. Note that for Revision, I used Tags for demo. You should use branches in your production environment.
- Application Name: sn-platform
- Project: default
- SYNC POLICY: Automatic
- Repository URL: https://github.com/yuweisung/pulsar-ops.git
- Revision: v2.9 Tags
- Path: default
- Destination: https://kubernetes.default.svc
- Namespace: sn-platform

4. After the app is created, ArgoCD will scan the specific tag/branch (hashcode) and sync the CRs to deploy the Pulsar cluster as we did in Part 1 using kubectl apply -f. The app detail shows the progress of the deployment.
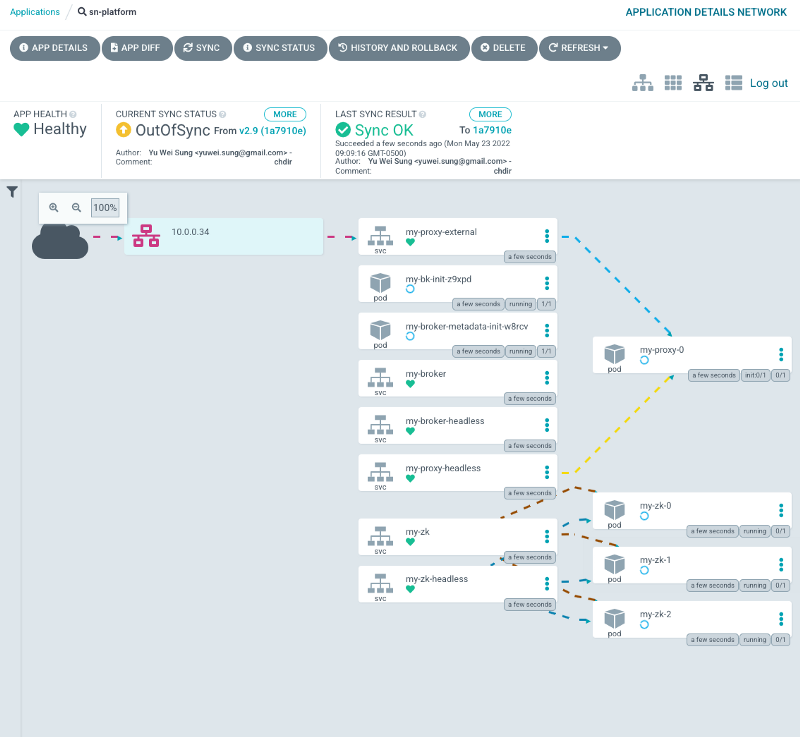
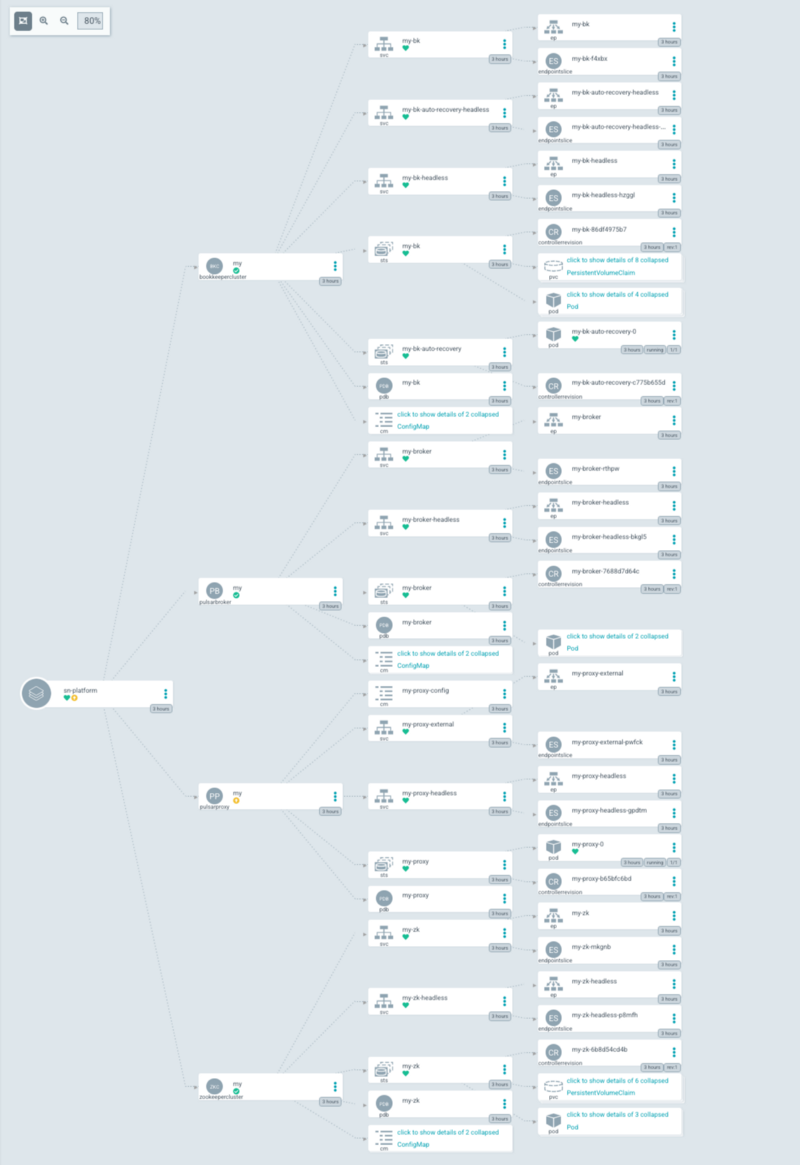
5. A few minutes later, ArgoCD will display the synced status and you can find all the manifests and their relations. Once everything is green, ArgoCD will keep watching the tag/branch and make sure the current cluster state matches the CRs in the tag/branch. If someone manually modifies the CRs or other generated manifests (kubectl edit <cr.yaml>), ArgoCD will detect the drift and change the CR back to match the tag/branch. The only way to change the configuration of the cluster is using git operations.
6. Next, use git push and submit pull requests to control the CR details, such as adding JVM options and changing replicas of CRs. If everything works well, ArgoCD should be able to detect the changes and auto-apply the operation changes.
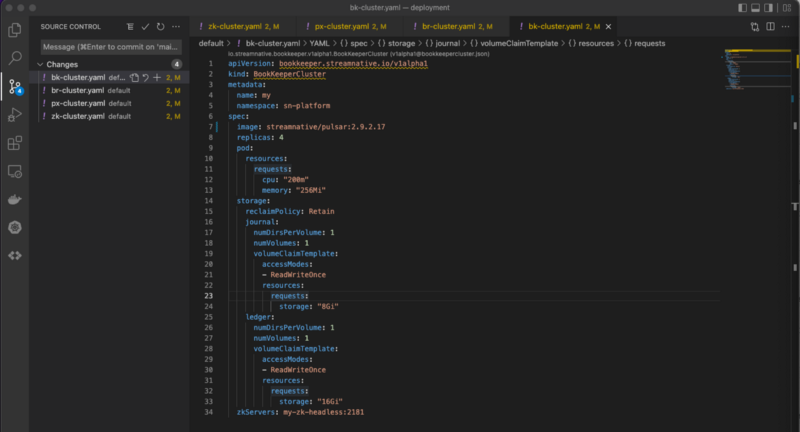
7. Change the image version from 2.9.2.15 to 2.9.2.17 and commit the changes.
8. After committing the changes, retag the commit to v2.9 and push with the force option.
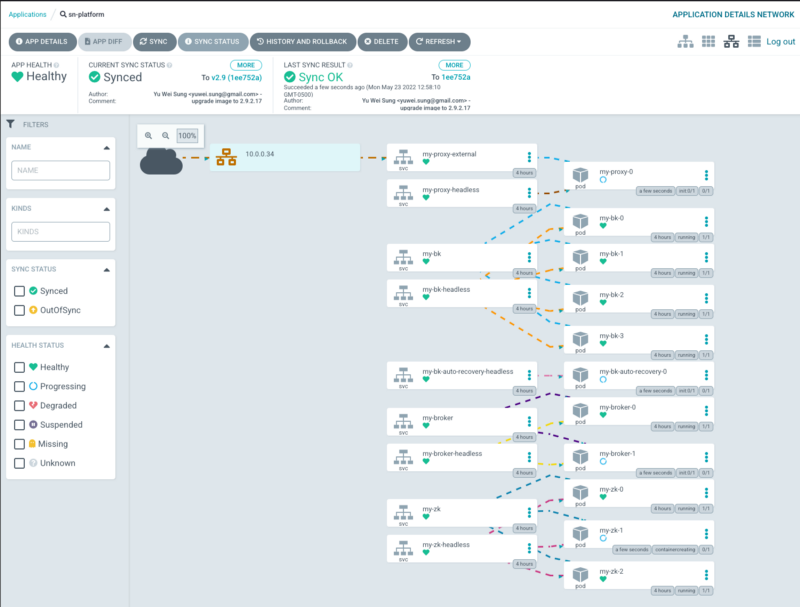
9. ArgoCD detects the commit changes and syncs the status automatically. From the Web UI, you can see that some components are in the “spinning” status as it follows the StatefulSet upgrade strategy.
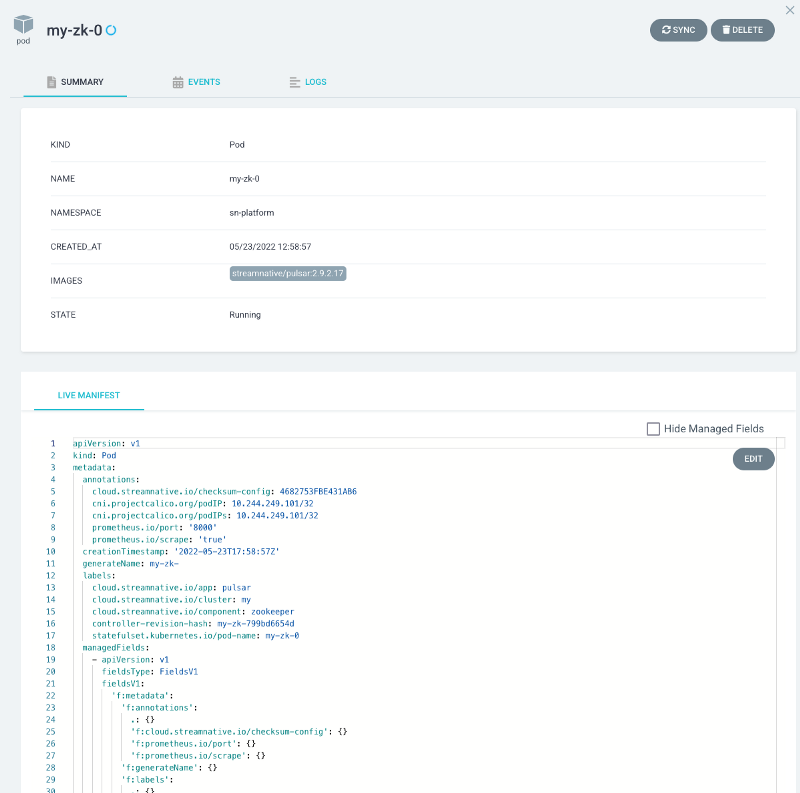
10. Click a ZooKeeper Pod and you can see that the image version has been updated.
11. Next, I want to use the same GitOps process to scale up/down brokers. Let’s modify the br-cluster.yaml file as shown below.
12. Run the git commands to force retagging the new commit to v2.9 and to force pushing it to the remote origin branch. Note that I used --force to retag the change. In your production environment, you should go through the PR and review process.
13. Once the code is pushed to the same tag, you should find the new broker (my-broker-2) running in the ArgoCD web UI.

Conclusion
With ArgoCD and GitHub, you can control Pulsar CR changes in an elegant way. Moreover, you can easily roll back and approve configurations, or find the change history from the GitHub repository.
In the next blog Part 3, I will demonstrate how to containerize Pulsar client apps using Dockerfiles. In Part 4, I will demonstrate how to use kpack to build Pulsar client apps without local Docker builds.
More on Apache Pulsar
Pulsar has become one of the most active Apache projects over the past few years, with a vibrant community driving innovation and improvements to the project. Check out the following resources to learn more about Pulsar.
- Start your on-demand Pulsar training today with StreamNative Academy.
- Spin up a Pulsar cluster in minutes with StreamNative Cloud. StreamNative Cloud provides a simple, fast, and cost-effective way to run Pulsar in the public cloud.
- [Doc] Understand Pulsar Operators
- [Blog] Pulsar Operators Tutorial Part 1: Create an Apache Pulsar Cluster on Kubernetes
- [Blog] StreamNative’s Pulsar Operators Certified as Red Hat OpenShift Operators
- [Blog] Introducing Pulsar Resources Operator for Kubernetes

Newsletter
Our strategies and tactics delivered right to your inbox